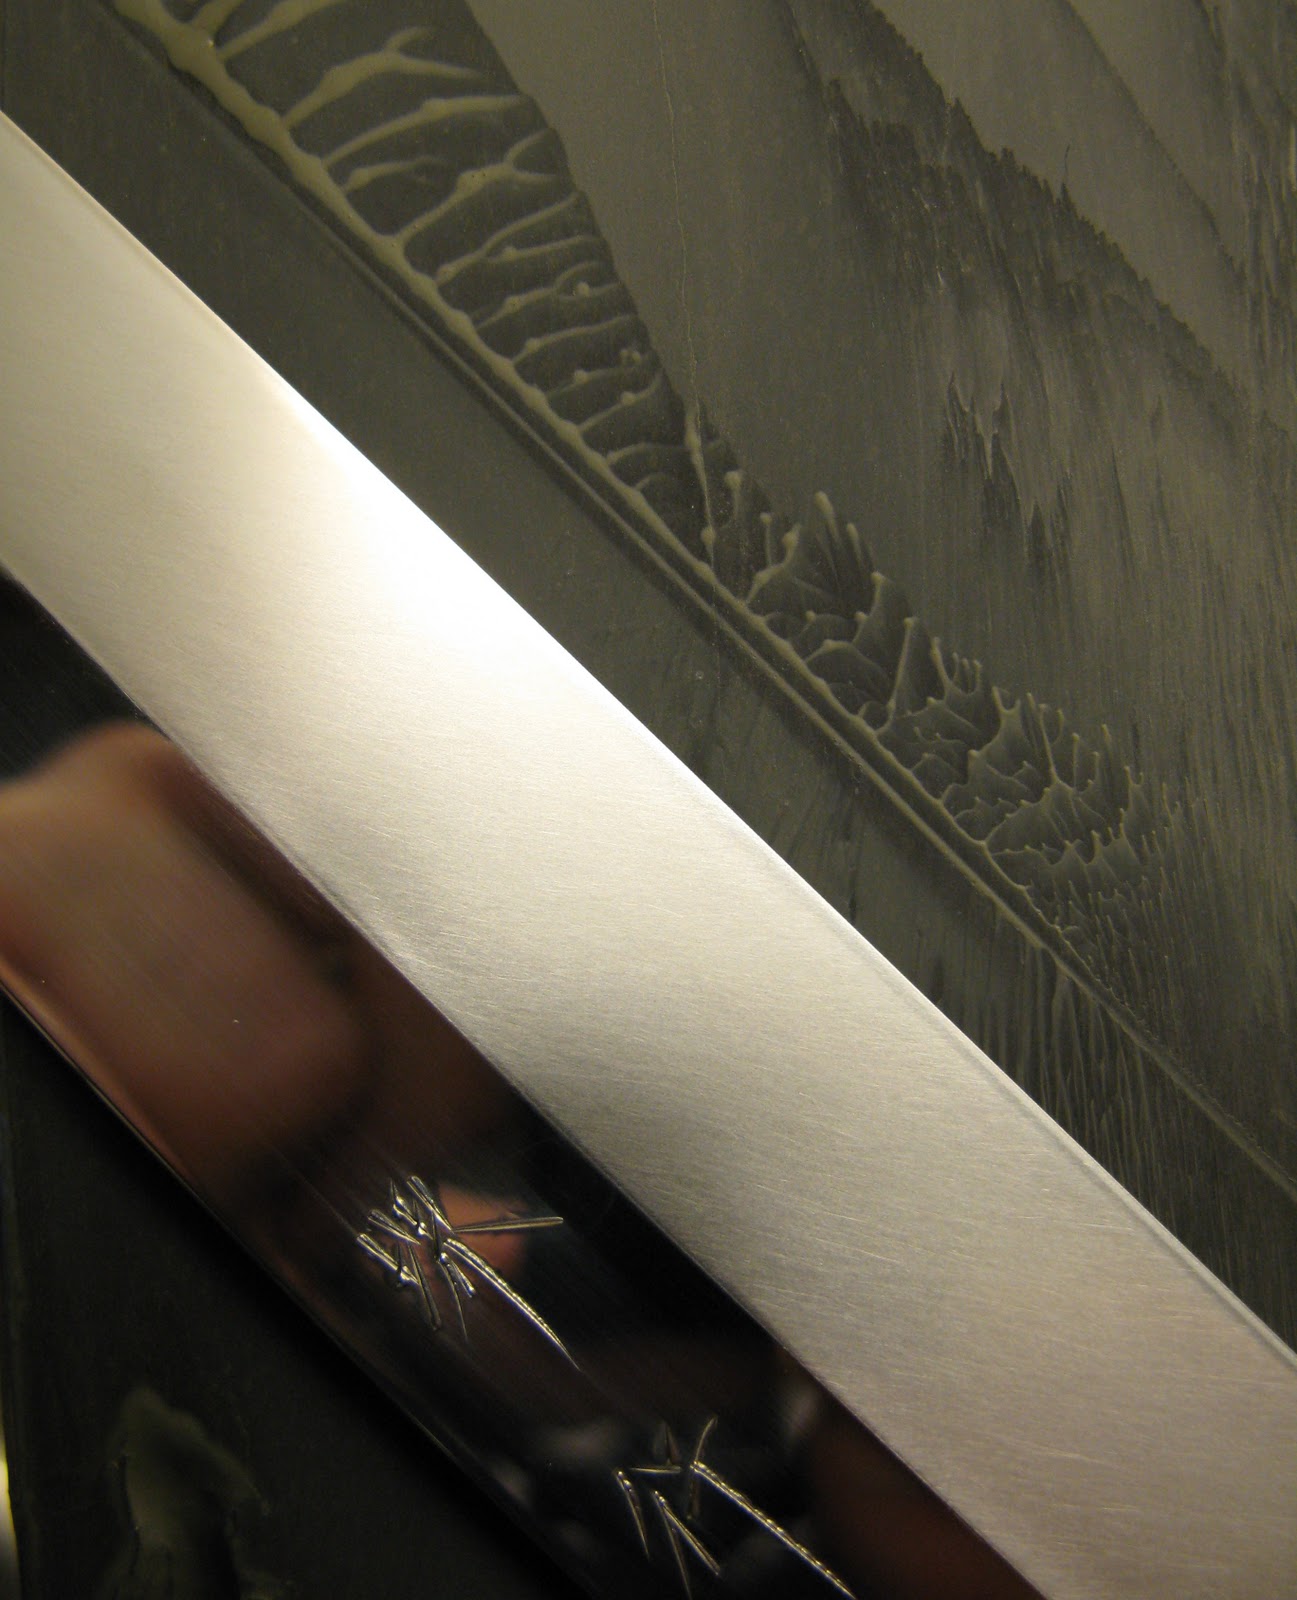
Shigefusa 270mm kasumi yanagiba with custom, by me, desert ironwood handle

7 Feb 2011

Honyaki sharpening - The JNAT "dream team"

True honyaki blades are indeed a special breed of knife. Very often they are hardened beyond practicality making them a true menace to maintain. However laborous these blades may be to keep sharp, I have come to love them unconditionally. I don't know whether it is the myth behind them, the excellent craftmanship, the excellent performance or the sheer beauty of these knives that has won me over. Probably it is a combination of all these factors. The fact that I just love to sharpen my knives probably helps a lot too. These are the honyakis to be sharpened in this test. From the top, a Kasahara Shiroko #2 honyaki 300mm yanagiba and three Aoko #1 honyaki knives from Jyunichi Takagi.

The honyaki blades used in this test of Japanese waterstones
In this excercise I have experiemented with some of the Japanese waterstones that are said to be best suited for sharpening honyaki blades. Based on my experiments I have found the stones that I find best for the task of getting my honyaki blades up to exceptional sharpness and to get that totally scratchless almost sand blasted surface on the bladeroad of my yanagiba. From the bottom of the below picture we have a #1500 grit White Aluminum oxide ceramic stone called a WA stone from Iida tools, then a #5-6000 grit WA ceramic and then I switch to Japanese naturals.

In the middle to the left is my large Aoto from Iida tools, and to the right an Aizu stone from Maxim at Japanesenaturalstones. Both stones are truly remarkable medium sharpeners. Second from the top to the left is a Takashima Myokakudani from Aframestokyo.com, a soft prepolisher with exceptionally even grit. To the right you see the characteristic red Nakayama Akapin from 330mate.com. A very soft but agressive and yet very fine stone. This is my "rescue" stone when I get these hard to remove scratches from man made stones. On the top left we have the very soft and very fine grit Hakka. A legendary finishing stone for honyaki. Also brought to me by Maxim at Japanesenaturalstones.com, and finally on the top right, an Oohira from Maxim also. The Oohira is what I believe to be a tomae; medium soft, fine grit, and I included it for comparison to the Hakka.

The candidates for the honyaki sharpening "dream team"
My trading agent in Japan told me that he always starts out with a special kind of synthetic stone to do the ground work on the blades. A #1500 grit White Aluminum oxide stone called a "WA" stone. The aluminum oxide is some of the hardest abrasives in man made stones except for diamond. The abrasive in this stone is very densly packed and leaves a very consistent scratch pattern. It is a very efficient and hard stone and it will easily correct any issues with the blade road and flatten the back side perfectly. It is very important to resolve all issues in this stage to be able to get a perfect result in the end. As you can see from the below pictures, the WA (White Aluminum oxide) stone is very agressive even on these very hard steels, making it perfect to do the ground work on the blades.
WA #1500 on Shiroko #2 honyaki

WA #1500 on Aoko #1 honyaki


WA #1500 scratch pattern on Shiroko #2 honyaki
After this successful start I decided to apply the #6000 WA to erase the scratches from the #1500 WA stone. This finer stone actually caused more issues than it solved, so I left it out alltogether. Maybe a softer man made stone of finer grit would have performed better, but I did not go further on this and decided to switch directly to the Japanese natural stones after the #1500 WA.

Next up was the natural medium sharpeners. The Aoto and the Aizu. Both rated #2000-5000. I did not know which was the finer of the two, so I briefly tried both, and found that tha Aizu was both harder and a bit coarser than the Aoto, thus I began with the Aizu. This beautiful white stone with its olive green dots is a wonderful performer on hard steels and removed the scratches made by the #1500 WA with ease, leaving a dense and fine scratch pattern. 

The Aizu is a fairly hard and agressive stone


Aizu leaving a very nice and homogenous scratch pattern
 After the Aizu I could probably have skipped the Aoto alltogether and moved straight on to the Takashima. However, I wanted to compare the Aoto to the Aizu to place them individually in my setup for future reference. The Aoto proved to be everything I had hoped for. Most Aoto stones available today are of mediocre quality and would not be suited for sharpening the hard steels of the honyaki. This was not the matter with my Aoto from Iida tools. It proved to be a wonderful performer even on honyaki, both white and blue steel. The scratch pattern proved to be even finer than from the Aizu, producing the perfect basis for the Takashima.


The Aoto making a dense very fine slurry

The finish from the Aoto leaving not much to be wanted


Very happy about the progress so far, i moved on to the prepolisher. The Takashima Myokakudani. It is a beautiful stone with a very similar look to a Nakayama kiita, but with a more "sandy" look to it. The Takashima has a very homogenous structure with a very low content of unwanted particles leaving a very fine and exceptionally "clean" finish.
The Takashima Myokakudani
 
Closeup of the Takashima

The Takashima makes a very dense and creamy slurry
 
Closeup of the Takashima finish


I was very happy to see that everything was going the right way. The blade road on my yanagi slowly turned into that magically hazy finish. The edges on all my honyakis were pretty scary sharp allready, and I still had two more rocks to go.

Next in line was the legendary Hakka. A very rare stone hard to come by these days. Maxim at Japanesenaturalstones.com occasionally manages to source these beauties. I don't know how, and I really don't need to know as long as he keeps on scoring the good stuff and resell it at very reasonable prices.
The Hakka is a pleasure to use. It is fairly plain looking at first eyesight, but if you look closer you will notice beautiful renge or lotus scattered throughout the stone. The surface feels very smooth and even, almost like cool silk to the touch.

The Hakka quickly gives up a very dense and creamy slurry that "floats" the blade. After a while the slurry dries in to a fine clay that gives the legendary hazy, almost sandblasted finish.

Hakka stone, deceptively plain looking


Hakka closeup.  Notice the red scattered renge


Hakka slurry is almost like fine clay

Hakka silky finish

Hakka finish
After finishing with the Hakka, I tried the Oohira from Maxim I mentioned earlier in this post to see if I could do even better. This Oohira is a very fine stone of very good quality and it has proven to be exceptional on both carbon steels as well as stainless steels. However, the Oohira had some renegade particles that left light but still visible scratches on the now very silky surface of my yanagiba. I thus had to refinish the bladeroad with the Hakka to regain the abolutely flawless finish. 
 So no matter how good this Oohira performs on other steels, It is not the perfect finisher for my honyaki yanagiba and did not make the dream team.

A very high quality Oohira from Maxim

Oohira finish on the Hakka finished bladeroad.
Note the very fine but visible scratches


To sum up this rather time consuming excersise, I have found my honyaki "dream team". The #1500 WA, the Aizu followed by the Aoto and the Takashima finally followed by the Hakka. I could probably do with either the Aizu or the Aoto, but they really filled in each other in a way that makes it hard for me to separate them from my setup. I did not find the need for the Nakayama Aka-pin this time although it could probably be used successfully at some point in the process. However the point was to find the smallest setup of man made and natural stones to finish a honyaki to perfection. The perfect range for a perfect finish. I believe the team picture below is my "dream team" for this specific task.

So, what about the edges?  The sharpest I have experienced on any of my knives. Ever! Especially the Aoko #1's really got exceedingly sharp. My gyuto finally got that magical Shigefusa feeling to it, just sliding through everything I cut. The Shiroko #2 yanagi got that stickyness to the edge that shushi chefs speak so highly about. Sliding my nail along the edge very carefully makes the knife "stick" to it.
My personal honyaki dream team of Japanese waterstones
Hope you have enjoyed reading as much as I enjoyed sharpening. Thank you for your interest.

DarKHoek

Sources to score the good stuff:
Hakka stone, Aizu stone, Oohira stone : Japanesenaturalstones.com
#1500 WA stone, Aoto stone, Shiro #2 honyaki yanagi: Iida tools Japan
Takashima stone: Aframes Tokyo
Aoko #1 honyaki knives: Japan woodworker
Nakayama Aka-pin stone: 330mate

14 Jan 2011

Forcing a patina on the Shigefusa 240 kasumi Gyuto

This little experiment is a result of the Great Gyuto Shoot-out, where the Shigefusa 240 kasumi gyuto proved to be very reactive to a lot of different foods, and pushing it down to a runner up position beat by the excellent Devin Thomas stainless gyuto.

Using the Shigefusa over time will slowly but sporadicly build a patina on the blade. The result, however, is a long period with a partly reactive, seriously spotted and not very elegant knife. The solution is obvious. To force a patina under controlled circumstances, evenly building a patina on the entire blade layer after layer. Again, Mr. Øyvind Dahle put his precious knives at stake for me to play around with. Thanks, man!
Setup: Knives, mustard, vinegar, lemon, cotton cloth and finger stones
For this test I had access to a second Shigefusa. A nice Kuro uchi nakiri, probably with the same core and cladding as the gyuto. As the exposed area of reactive metal is a lot smaller on the Nakiri than the Gyuto, this would be the perfect place to test out the acidy mix before going all in. Before starting I used some fine stone slurry on a cotton swab to polish of any old spots and removing all traces of fat and dirt from the blade. 
Building a Nakayama Aka-pin slurry
Priming the polishing cloth with slurry


Removing stains and fat from blade

I used a 50/50 mix of Dijon mustard and white 7 % cooking vinegar and added a small squeeze of fresh lemon juice. This gave me a very nice "paint" easily put on with a silicon brush. Any brush can be used, but a silicone brush will be reusable after a good wash. 

After cleaning up the blades, I took them to my water tap and using the warmes water available I heated the blades. This heating will make the acidy liquid evaporate quicker, and by doing that making the surface of the steel react more quickly with the oxygen making a patina form on the steel more evenly.
Heating the blade under running water to acellerate evaporation and oxidation (patina) on the blade


Thick layer: Slower method, but it works fine

Shigefusas curing, slowly building a patina. For the patient souls.
I tried two different ways to apply the solution. One was to brush it on with the silicone brush as shown above. The other was to apply some of the solution on a cotton cheese cloth and wrap it up so that only the thin liquid was filtered through the cloth and applied to the blade as shown below. This last method proved a lot more efficient as the liquid was applied thinner, cooling the warm blade slower thus making it evaporate a lot quicker on the preheated blade and building a thicker patina.  
Adding a thin layer on warm blade proved to be quicker and easier done

Priming a cotton cheese cloth

After experimenting a little back and forth between the two methods, about 20 heatings and acid applications in total, I cleaned the blades off for an inspection. At first it didn't look like it had built a patina at all. However when placing a new stainless blade on top, I could easily observe the very nice almost champagne coloured patina that had formed on the Shigefusa blade. The hagane had blued up as expected, but as I had expected this blueish colour on the entire blade I was a bit surprised.  
Note difference in color between patina on the Shigefusa and the stainless steel

It was time to put things to the test. To see if the patina was resilient enough for normal use or if it would wear of at the first contact with real food. It was time to get Shiggy with it :o)

First up were a couple of ripe tomatoes. Usually this would stain the knife significantly, but the nice patina stayed nice with no new stains or ugly smell developing. Then a spiced raw chicken breast. Still nothing. Then I sliced the cooked chicken while quite hot. Still no reaction. The patina looked stable. After cleaning the knife off after slicing the hot chicken, the parts of the blade that had touched the warm protein had blued up a bit like the hagane had done in the first place. However the patina held up nicely and the blade did not react negatively to the protein. Very good!


After this rather uplifting experience I decided to put the patina to the ultimate test. The most reactive food from the shoot-out, the dreadful cabbage! I used the Shigefusa to finely slice the cabbage into angel hair slices closely observing the blade, but nothing happened. Nothing! I got braver. I buried the blade in the freshly cut cabbage strands, really packing it around the blade and let it sit there for 10 minutes.


Shigefusa in cabbage hell

Coming out of it with bells and whistles. I believe we have a winner!

Before this process the result would have been a partly black, partly rusty mess of a gyuto, but after pulling the blade out of the cabbage heap from Shigefusa's personal hell, it showed no sign of reaction. The cabbage was fresh, the blade still looked good and no nasty smell was evident.

Most important of all. In my opinion, the Shigefusa gyuto is still the best performing gyuto around by a good margin. With the nice patina forced on the blade, bringing the heavy reactivity to food under control, you no longer have a good reason not to want one. This is an absolute marvel of a knife, and I want one my self. Badly! Case closed!


11 Jan 2011

The great Gyuto Shoot out!

After two full days of slaughtering produce, here are the final result of the grand gyuto shoot out. My good friend and fellow knife nut, Øyvind Dahle, kindly put up his collection of custom gyutos to the test. I brought only my trusty Takagi, but as you all know by now, I am more of a yanagi guy.

As mentioned the test was conducted over two days. We had one day of testing out the knives, collecting first impressions and testing and selecting stones for the final sharpening, and one day really sharpening up the contestants and comparing them in a more detailed cutting test setup. We also did some test sharpening on a lot of different stones to pick a sharpening setup for day two that would give the knives as similar and as sharp edges as possible for the different steels. Here are som pictures from day one, cutting cabbage and prequalifying stones for day two and serious sharpening. 
 
Trying out the Oohira shiro suita
 
Oohira asagi ready to go


Devin Thomas 240 vs cabbage
 
Hiromoto 240 vs cabbage
 
Shigefusa 270 vs cabbage


After a wonderful cutting frency with some of the absolutely most beautiful and high end gyutos available, it was time for some serious testing. and comparison. Even on day two I was just cutting produce, as produce comes in a wide variety of size, structure and toughness. I went to my grocery man and picked out some large carrots, large hard potatoes, ripe tomatoes, some red chillies, a couple of large onions and a big chunk of fresh ginger. Ginger has a very fibrous core and will really put the edges to the test. I saved that for the finals. I also had some cabbage left from yesterdays cutting frenzy with Øyvind. Here you can see the choice of produce I used for this test. Also a closeup of the brave contestants.


From the right you have the Shigefusa 255mm (actually it's more like 270, so I called it 270!)  with a beautiful custom handle by Marko Designs. Number two from the right is the Hiromoto 240mm with a very nice custom handle by Dave Martell. In the middle we have the grand Devin Thomas 270mm forum prototype with a custom handle by unknown maker (Devin?). Then the beautiful Devin Thomas 240mm again with a stunning custom handle from Marko Designs. And finally to the very left, my trusty Takagi 210 with a custom handle by me. Except for my own Takagi that I have built a very solid patina on, they were all nice and shiny. Getting to know them only yesterday, I couldn't wait to put them all to the test.

As I mentioned, the first thing I did was to sharpen all knives using the stones we had matched with the steels the day before. All knives were fairly sharp, but all had some potential, and in addition I wanted them all to have similar edge geometry to be able to compare them with one less unknown factor.

The stones that were chosen were my very good, efficient and even grit Oohira asagi as pre-finisher for all knives. Then three different finishers for different steels. A Nakayama karasu for AS and SS, a Nakayama nashiji kiita for the Shigefusa Sweeden steel alloy and finally the Oohira shiro suita for my Takagi Aoko #1 honyaki. Just for the fun of it I tested all knives with all finishers. If a finishing stone was a total mismatch with a knife, I went back to prefinish on the Oohira asagi before I took the knife back to the finisher particularly chosen for the knife, to regain the best possible edge for each knife. 
From top: Nakayama nashiji kiita, Oohira shiro suita, Nakayama karasu, Oohira asagi

I made a judgement on sharpening feel and the edge on each knife off each stone and gave each knife/stone combo a "Match point" describing how good the match was and put it all in to a table. A score of 1 equals no match between stone and steel while 5 equals a close to perfect match. The results may be interesting when choosing your stones for a given steel, but I make no guarantees as results will vary. You will still have to experiment, but maybe you can narrow down your selection a bit.


After finishing all knives as sharp and as close to each other as possible, I went on doing the veggie cutting tests. Here are some pictures from the testing.


Shigefusa potato slice :o)

Shigefusa reacting to cabbage


For each knife and each type of vegetable I judged the percieved sharpness of the blade. That is the force I had to use to drive the knife through the vegetable. A score of 1 equals a lot of force needed while a score of 5 equals very little force needed (of course relative to the vegetable in question). The force needed wil depend on several things lik the geometry of the blade, the taper from the spine to the edge, the structure in the grind on the blade and so on. I also made a judgement of how well I could feel the structure of what I was cutting. If I could feel the layers of the onion or cabbage or the fibres in the ginger root. Finaly I looked at how the steel reacted to different foods and if the steel was discoloured and produced a smell that transferred to the food. A score of 1 equals not reactive and a score of 5 equals extremely reactive.


To sum this up I had several favourites during the test and a few disappointments. None of the knives were consistently best at everything, and most knives were fairly good at most tasks. However, the Shigefusa stood out clearly in the cutting department. There was something about how the Shigefusa just slid through the food totally effortless that was very close to magic. It felt like cutting soft butter with a warm knife. So as far as pure feeling of cutting goes I would have to declare the Shigefusa as the winner with the Devin Thomas 240 as a close runner up. 
The knives resting out with the final results

One HUGE drawback I experienced with the Shigefusa was that it is exceptionally reactive to several kinds of vegetables, particularly the cabbage and onions in my selection. This reactivity resulted in discoloured food and steel and an ugly sulfur like smell from the blade. I really don't understand Tokifusa Iisuka's choice of cladding steel for this knife, as the core steel is like something out of this world. 

Taking the heavy reactivity to food in to account, the gold medal will have to be passed over to the Devin Thomas 240. An exceptional knife in every way. Well balanced and beautifully made and a wonderful all round performer. I particularly liked that it gave a very distinct feel of the structure of the food I was cutting. I could almost feel the freshness of the tomatoes through the knife. The Devin Thomas knives are relatively easy to sharpen but quite sensitive to the choice of finishing stone. Both DT knives were a disaster on my Oohiro shiro suita, but matched very well with the softer Nakayamas and took a very keen edge. 

The Hiromoto was a good overall performer that did absolutely nothing wrong and that will satisfy a lot of  users. It is very comfortable to use and very well balanced. It was easy to sharpen and to get sharp. To my satisfaction, my trusty old Takagi held its ground against these race horses as far as sharpness and cutting goes, but I sadly came to the conclusion that it is actually way to light for my preferences, and I will probably in the market for a somewhat heavier knife pretty soon. I really liked both Devin Thomas knives, and the Hiromoto was also a very enjoyable aquaintance. The Shigefusa, no matter how magic and beautiful, had this issue that was very hard to ignore.

I had a lot of fun doing this test. Thanks again to Øyvind who trusted me with his precious knives.
Next blog post will be "How to force a patina on Shigefusa kasumi gyuto" ;o)

daRKHoeK