Shigefusa 270mm kasumi yanagiba with custom, by me, desert ironwood handle

Labels

Stones (15) Knives (10) Sharpening (10) Review (9) Test (9) Knife building (7) Knife handles (7) Refurbishment (5) Pimp My Knife (3) Food (2) Saya (2) The Black Pearl (1)
Showing posts with label Pimp My Knife. Show all posts

19 Dec 2011

Petty and Victorinox rehandle

This is what I have been working on lately. My friend Øivind had a couple of knives he wanted me to rehandle and I needed at couple of "easy" projects to keep me going. I have a couple of ongoing project that really challenge my skills. One of them is the Hiromoto sujihiki rehandle and saya in a previous post. The other is a Keijiro Doi Shiro Kengata Hayate that will get a new handle, a matching saya and a matching pair of moribashi, but more on that in a later post.

Now, on to the rehandle projects.

I have done a "pimp my Vic" for Øivind before, and the petty was a very nice little damascus blade with a western full tang handle that he wanted me to makeinto a hidden tang with a little more palm swell to fit Øivinds largeish hands.

I didn't actually make WIP of these knives as I kind of lost the "spark" after the mess over at KKF. It just tore me apart. Hope to be back with more elaborate posts after this one.

Anyways here is a couple of pictures of the finished knives. Sorry for the crappy shots, but the lighting was not the best and the blitz on the camera really does more harm than good in this kind og photography so I had to manage without it. I hope that Øivind is pleased with his knives.

The petty got a handle from stabilized Redwood burl from Burl Source. Thanks again Mark for excellent stuff. The saya is also from redwood burl but unstabilized. The handle spacer and end cap as well as the saya pin is from Musk ox forhead. Hey, it's Christmas! :o)


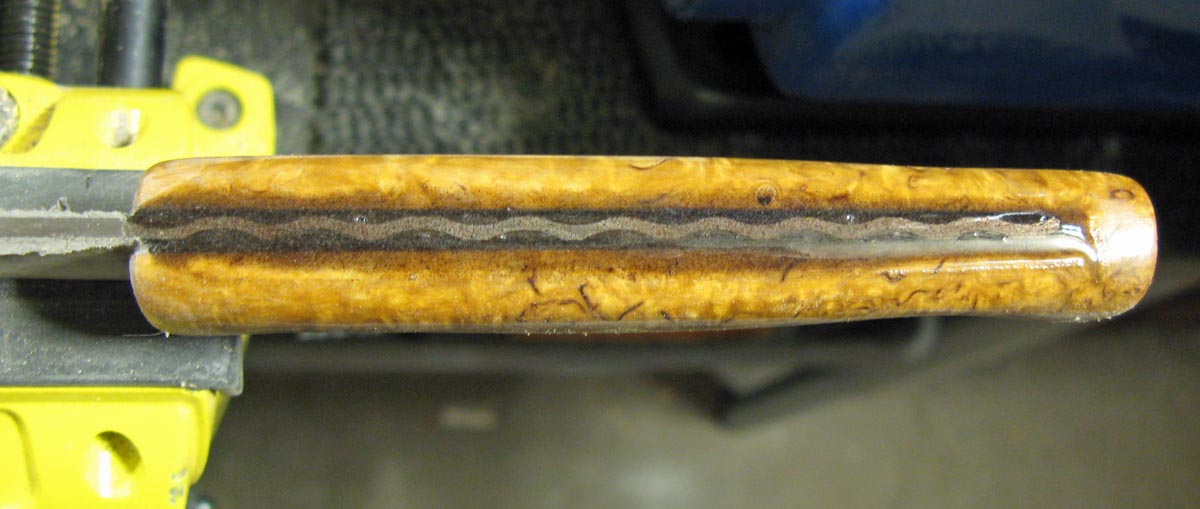
The handle on the Victorinox is from a two tone brown dyed maple burl from Burl Source also. Mark, you just blow me away with all that spectacular wood. Three 1,5mm pins from nickel silver and a file worked spine on the tang. Handle is glued up with black epoxy to better show off the file work.


Thanks for looking.

Harald.

14 Nov 2011

Handle and saya on Hiromoto sujihiki


A great sushi Chef in New York sent me a Hiromoto sujihiki blade with a block of stabilized spalted Hackberry wood that he wanted to have made into a handle. He also requested me to build a matching saya for the handle, but as soon as I saw the handle block I new I was in for a real challenge. The handle block is one of the most dramatic pieces of wood I have ever seen, and judging from the weight of the block it must have come a long way in the deteriorating process so allowing the stabilizing liquid to really soak through the wood. Challenge was to find wood for the saya that was not stabilized but still solid and spalted or figured enough to match the handle.

The blade is a Hiromoto san mai kasumi sujihiki wich has been etched (by Dave Martell?) to bring out the dramatic lamination line between the core steel and the soft cladding. The cladding had gotten an almost shimmering surface from the etching which stood in great contrast to the almost black core steel. My first thought looking at the blade and the handle block was that this would going to be one dramatic looking knife when finished.

Spalted hackberry wood - stabilized block, and the old handle
As soon as I started working on the handle block it soon became very clear to me that I was in for another challenge. The wood was so hard and dense that I had a really hard time working it. Both cutting, sanding and grinding was a really tedious process and it ate my sanding paper like it was made of wet newspaper. What was this wood anyway, petrified? Stabilized with shot proof glass?

Searching through my stock of different horn material I found a really nice marbeled piece of cow horn with dark and tan stripes that would match up really nice with the colors of the handle. After working out all the pieces and sorting out the order of which to put them I was finally ready to glue everything up. I have found this a good way to do it as I do not have the time to think and fiddle around when glueing things up. The worst things that can happen in this stage is that the glue starts to harden in the middle of the process so that everything is glued up with skews and voids all over the place. You might be able to salvage the wood but all bolsters and spacers will be heading for the bin.
All handle parts lined up and ready for assembly

  
All parts glued in with epoxy glue


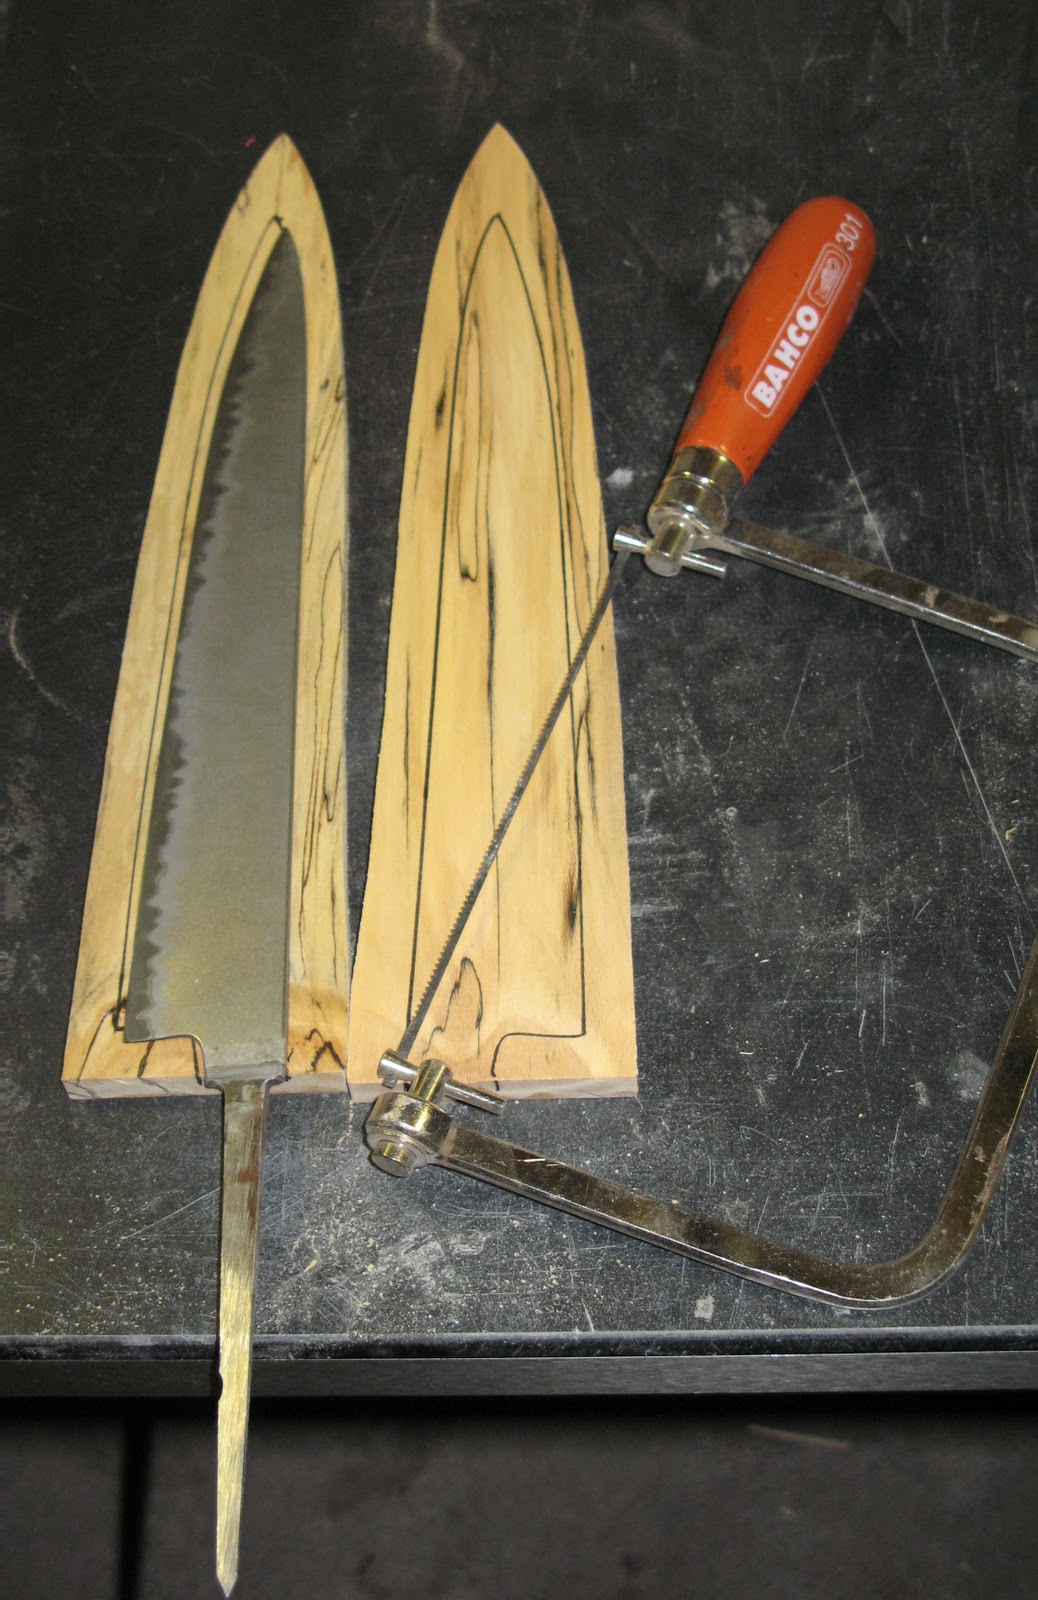
While the handle was curing I could start working on the saya. I had gotten a nice piece of spalted Sycamore thin lumber that was still all solid. It was sold as luthier wood, but it was perfect for saya material. After outlining the shape of the blade on the wood I cut out the pieces with the necessary extra space around for glueing and shaping. As the ink line was just on the surface of the wood I had to grind down the pieces to about the right thickness from the side going to be the inside of the saya. If I had done all the grinding of the saya after glueing I would risk to remove all of the beautiful inkline from the wood.
Outlining the saya on the spalted Sycamore
Profiles sawn out slightly oversized


So, with the coarse shaping done I could start working out the cavities in the saya to fit the blade. The cavities should be as small and evenly shaped as possible without clamping the blade, and it is wise to make a 2-3 extra mm of space for the tip of the blade so the saya will not break it off if the saya is dropped when the knife is inside. The cavity along the edge should be as even as possible to protect the edge by distributing the pressure of the edge along the whole length of the saya if you get impacts to the saya with the knife in and pin out. Bumps along the edge line inside the saya can easily chip your blade.


Carving the cavities for the blade - Baby steps!!
 
Regularly checking the fit


Drilling and carving the tang hole in the handle gave me my next challenge as the wood clogged my drillbits every 2-3mm of drilling even if I was using a hand drill and going really slow. The clogging seemed to harden instantly like super glue in the cavities of my drillbits making them almost impossible to clean up. It took ages to drill two small holes for the depth of the tang. The rest was done pretty efficiently using a tiny square rasp and a very narrow saw that I have modified for this special task.  
Getting ready to drill the tang hole


Tang hole finally done


After shaping the saya and handle I was now ready to fit it all together. The saya was too light colored to match the handle so I dyed it with a spirit based wood dye. After some tests on a piece of saya wood I found mixing two parts "grey oak" to one part "red mahogany" would do the trick. After the dye had dried up I sanded down the saya with #800 paper until I got just the right color. Then I saturated the surface of the saya in Danish oil which gave me the exact color and hue I was looking for. After 48 hrs of letting the Danish oil harden, I gave the saya a final buffing with a wax based wood polish to give it a nice and silky shine.

All parts finally ready for assembly - Note the very light wood in the saya

Next up was to glue the blade in place. I had made the tang hole very slightly oversized to be able to micro adjust the handle on the blade. I wanted to give the handle a 1-2 degree lift related to the blade to make it more comfortable to use over time.

All taped up and ready for assmbly


Handle glued in place


Even if I had a really hard time working the material for the handle, this was one of my most rewarding projects ever. Before I started I feared that the heavy handle material would throw off the balance of the knife, but it came out perfect with a balance point just under 1" in front of the handle. The handle wood is some of the most spectacular wood I have ever seen and it really accentuates the dramatic lamination line of the etched blade. I was pretty happy with how the saya turned out as well to be honest. To pimp it all off I made a matching pin for the saya using the same marbeled horn as I used for the bolsters. Note the dark stripe in the pin matching up with the ink line in the saya :o)


Well, that's all, folks. Thank you for reading. I am happy for any comments and suggestions to my work as usual, as your comments is the only way I can get better at what I am trying to do. 
 

PS! NO power tools were used for this project. All toos used, except for the sanding paper and a Japanese ryoba saw, are shown in the pictures. This was done partly because the handle material did not allow for the use of power tools and because I wanted to see if it could be done in a proper way without the use of powertools. It took more time, but I did not heat up the materials at all, witch will reduce the possibilities for cracks and warping.

16 May 2011

Pimp My Knife! - Victorinox refurbishment project

I was discussing good bread knives with my friend Øyvind, and he told me he was planning to order a Güede. I told him that the Victorinox would probably be a better choice and a lot more bang for his buck than this pimped up Güede bread slicer.

As it was, Øyvind already had the Victorinox in question, but he believed it was to old and to ugly looking compared to the rest of his magnificent collection. He then came up with a cool suggestion. I could do a rehandle on his Victorinox. A "Pimp My Knife" project.

The Victorinox is a mid-end blade, higly commercialized and not exactly an eye-catcher. No matter its humble pedigree, it is a blade that is actually one of the very best in what it is designed to do. It is a long time favourite amongst European chefs, and I doubt that you will find a professional kitchen in Europe without at least one of these knives. It is called "The world's best bread knife", and as far as cutting bread or cakes, I have not come across any knife that does it better.

To cut a long story short...
The blade and handle sure had some issues that needed fixing, so I accepted Øyvind's challenge to "pimp" his Victorinox. The starting point was a bit depressing looking, and I sure wondered what I could do to the knife to make it shine again.


First task was to get the old, cracked handle off without damaging the blade. Drilling out the rivets, which were aluminum, was easily done. At this stage I also sharpened the blade on the back side with a #1200 Aluminum oxide stone to bring out a fresh serrated edge. This grit made it fairly sharp while keeping the toothiness required to cut bread and especially crust effectively. I would later remove the scratches when satin polishing the blade.


Next up was to find a nice piece of wood to fit as the new handle. I wanted to keep the semi-hidden tang from the original handle, so I needed a block rather than scales for this one. I know Øyvind and he is a lover of curly and burly woods. I happened to have one that was both curly and burly, and it was Norwegian as well. A nice stabilized block of exhibition grade Masur birchwood.

I wanted to make a handle that had a little more belly and palm swell than the original handle, but still keep the light feel of the knife and its grip-friendlyness to both large and small hands. I thus made a rather highly contoured shape with a good palm swell but with narrower grip towards the blade.


I was wondering what to to to make the knife a little more special looking. After all this was a "Pimp My Knife" project. A knife I had seen on an exhibition a few weeks earlier gave me the idea. Fileworking the spine in the handle. So I started out experimenting on how this could be done as easy and consistent as possible. I ended up using my high power Dremel with an extention cord and a small sanding drum with a #120 grit aluminum oxide paper. This worked like a charm!


Next up was to attach the blade to its new handle and align everything. I sanded out a little extra space in the slot for the tang to fit a couple of black fiber spacers to give a better contrast for the file worked spine.


To finish the handle I used #220, #400, #600, #1200 and #2000 sanding paper followed by a light wood buff on the wood and a green metal buff for the spine and the pins. I also fitted a nice mosaic pin to give it that final "Pimped" look. I gave the blade a nice satin finish with a #1200 fibercloth doped with aoto powder, giving the blade back the as-new finish.


This Victorinox has been officially DarkHOeK Pimped!
Thanks for reading.