Shigefusa 270mm kasumi yanagiba with custom, by me, desert ironwood handle

10 May 2011

Mystery stone - a nice pre finisher for kitchen knives #6-8000 Lv3 - 3,5

I frequently browse the Internet for japanese natural stones in my quest to learn new things about them and maybe find the occasional bargain. It is an exciting treasure hunt that has brought me more paperweights than actual usable stones, but every now and then I score a good stone at a bargain price.

This nice little rock I found on e-bay. I misspelled the search word and wrote "toisi" instead of "toishi". The search returned 1 hit, and this "toisi" was up for auction. There was one bid in, but I waited for 4 days until 15 seconds before the end of auction and bid $10 over the current bid and I won! A couple of weeks later it arrived in my eager hands and I couldn't wait to try it out. Hoping that the stone would be good but expecting just another paperweight.

Nice and clean stone. A corner missing but good size.
No cracks but a few firm and light inclusions not affecting sharpening negatively.
Observe the small black seeds like vanilla

Kiita with a greenish hue to it. Almost like green tea jelly with vanilla seeds

Clean and homogenous side with a few firm lines


The stone looked very old as it was previously lacquered to reinforce it due to its rater soft composition. The lacquer was yellowish and tarnished of age and the stone looked used. That was a good sign. I started out removing the tarnished lacquer and applied a couple of fresh layers to keep it stable.

The stone board is free of cracks but have some firm inclusions that does not effect sharpening in a negative way. The colour is kiita with a greenish hue with what looks like vanilla seeds in it. Very small black dots spread evenly throughout the stone. Might be renge or goma or something. It seems very uniform and has this velvety cool feeling to the touch.

The skin is very nice and dramatic looking with its very clear palette ranging from dark brown to a rusty orangey color. The stone itself on the bottom side is a light kiita color.
Dramatic and beautiful skin on the stone

Very nice back side with a clean kiita color under the skin

So for the sharpening experience. I pulled out my trusty Kasahara Aoko #2 kasumi usuba from Iida Tools. I use the same knife for all my tests as this gives me a firm reference for comparison and a large area to show the qualities of the stone.

The stone gives up slurry quite easily. The slurry to swarf ratio is fairly modest and the feel was very creamy and non-scratchy. What was immediately apparent, however, was the stones ability to make a high contrast between the jigane and hagane on the knife. It was clearly visible even through the ritch slurry. Even if it is a fairly soft stone it wears pretty slowly and will stay flat for a long time.
Very rich slurry. The light color indicates modest swarf to slurry ratio.
Looking at the result, we can se that the stone is not a final finisher. However, it produces a finish with very shallow scratches which makes it a very good pre-polisher for the final finishers. It also leaves a fairly dramatic contrast between ji and ha which I like a lot.

Nice contrast between jigane and hagane, but not the finest of finishers.

To sum up. The stone was a bargain for the price paid. However, most of the times you get what you pay for and this is not a very agressive nor a very fine grit stone. I believe the quality is fairly good.

The stone is a fairly good performer that sharpen most kitchen knives more than sufficiently for daily use. The edge off the sone compared a lot to the edge off my Oohira Asagi which is rated Lv 4,5 and #6-8000. As it is a fairly soft stone it is also very easy to use and very forgiving when sharpening. I believe it will be a very good stone for the beginner and intermediate sharpener.

If anyone have an idea what stone this might be, please leave a comment. I am excited to hear your opinions.

11 Mar 2011

Nakayama?? Karasu - A lot of power in a small package #8-15000

In view of some of the comments to my latest post regarding the Aka-pin stones, I am not sure if I dare to describe this stone as a Nakayama, even if it looks very similar to other stones on the Internet stated to be Nakayama karasu and as it was was sold to me as one. I will thus merely call it a Karasu stone, and that it definately is! I have previously reviewed another one of my karasu stones here: http://darkhoek.blogspot.com/2010/11/double-trouble-yamashiro-karasu.html

This little beauty might very well have a different origin than Nakayama. However, the origin is of merely academic interest to me as the real purpose of my stones is to sharpen my knives, kanna and chisel to a useable level. Actually most of my knives are way sharper than just useable, due to me sharpening them a lot more than strictly required.

This particular little stone was one of my first Japanese natural stones, and even after trying a magnitude of different stones this little beauty has earned its place in my setup as one of my absolute favourites. It is fairly hard, maybe around Lv4, very efficient and exactly the perfect grit range for most of my kitchen knives, leaving a nice mist and haze on my kasumi blades and a very keen edge with just the right amount of bite to it. Karasu can also be fairly soft and Maxim at japanesenaturalstones have a very nice and soft one that I hope to experience one day.
A beautiful stone alltogether. I love it!

Small and thin but very clean and free of cracks

Beautiful karasu like a modernist painting. A true gemstone.

The board is light grey with spots of greenish to yellowish in it and with a dense karasu pattern showing a shine in the dark mica in the stone making the karasu so efficient as a sharpening stone. I looks like it has got a perfect camouflage. It also shows some nashiji pattern enbetween the black karasu. This stone has really got it all.

The white lines in the board looks almost like paint spill on the stone and is close to the same hardness as the rest of the stone and thus of absolutely no consequence to the sharpening.

When sharpening, the stone pulls black metal filings immediately proving that this is a very efficient and fairly hard stone. You can see the metal filings suspended in the clear water before a slurry has built. This is usually a good sign, but it is no guarantee for the stone being a good sharpener or finisher. It is just a proof that the stone removes metal, which is only one of several things a good stone will have to do.
Black metal filings suspended in clear water = extraordinary efficiency.
After about 50 strokes on the stone, a dense dark olive slurry builds, making the sharpening experience a lot smoother and creamier. Not that the stone is scratchy. It isn't, but the feel of the stone changes as a slurry builds up. The stone is not very thirsty and the slurry holds up for a long time befor I have to add water to it. This provides for a very consistent result as I can concentrate on the sharpening and not consistently add water to keep the slurry within my comfort range.
Dense dark slurry building up
When looking at the finish, you can still se a few very light scratches, mainly in the soft steel jigane. This might be a result of poor ground work or me being a little bit too impatient. The edges off this stone, however, is some of the keenest edges I am able to produce on my knives. Especially on regular kitchen knives like my gyuto, nakiri and santoku. Exceptionally sharp but still with a very nice bite to them making the knives a pleasure to use both on proteins and veggies. It is a highly versatile stone handling all the types of steel I have thrown at it equally well, from soft 440C to blue #1 honyaki. That is an unusual but highly desireable feature for a japanese natural stone.
Not a high polish finish, but a very keen edge
From my experience it seems to me that karasu stones are generally efficient sharpening stones. However, I have heard that karasu stones, like asagi, can be quite scratchy and produce poor results if used unwisely. If you can find a good one, it should be a part of any Japanese natural sharpening stone set-up, but as these beauties are becoming quite rare you will probably have to expect a high cost. I really love this stone. It looks beautiful and is an excellent performer. My only whish is that it was a little bit thicker, but a full size stone of this quality would be dramatically out of my reach pricewise if at all available.

However small, this little stone is an absolute pleasure to use and one of the very few true gems in my collection. As it is a fairly hard rock, hopefully it will last a long time.

DARkhoEK

8 Mar 2011

2x Nakayama Aka-pin review. Variations on a theme...

I bought two Nakayama Aka-pin stones from 330mate.com in the same batch. The long and thin one was stated as a Lv3 stone and the wide and stubby one as a Lv2+ stone. Not looking at the size, the two stones look and feel very similar to each other. Roughly the same colour and the same lotus pattern, similar surface feel and fairly similar in hardness. I thus expected them to be relatively similar in performance and use. I could not have been more mistaken. The two stones, however similar would prove to be as different as two stones can possibly be, being approximately the same hardness and grit.
The two Nakayama Aka-pins looking very similar.
I name the top one Aka-pin #2 and the lower one Aka-pin #1

Nakayama Aka-pin #1 close-up

Nakayama Aka-pin #2 close-up


For this review I used my trusty Kasahara Aoko #2 kasumi usuba from Iida Tools (as usual). Using the same knife for all my stone tests makes it easier to compare the results and posible to compare results over time.

I started out with the #1 stone. It is long and narrow and quite thin, but very clean and without significant cracks. Just a few hairlines in the board. The surface is red to orange and full of darker lotus patterns. It is a nice looking stone.

I was amazed by this stone from the first time I used it. I sprayed the stone with a little water and started sharpening. The stone pulled metal filings from the first stroke leaving the metal particles floating in clear water on the surface. I was really amazed by the efficiency of this stone. After about 30 strokes, a dense dark grey slurry built up making the sharpening experience really smooth and creamy. The dark colour of the slurry is due to a significant part of it being removed metal. 
 
A dark grey slurry coloured by the metal filings

Metal filings floating in clear water after a few strokes

The real surprise came when inspecting the result of the sharpening session with the Aka-pin #1. A totally smooth and even scratch pattern and excellent contrast between ji and ha showed up under the slurry. I could not believe my eyes. Could a stone this fast, agressive and soft be this fine? Obviously it could. It was obvious to me that this little stone was of excellent quality and that the price paid was a bargain.
An almost flawless result from the Aka-pin #1
Next up was the Aka-pin #2. A somewhat larger stone. Wider and thicker, but a little shorter. Approximately the same colour, but Aka-pin #2 have some really nice ring formed lotus patterns that I have learned should be a sign of better grinding force. Could this stone possibly be even better that Aka-pin #1? If so, I would be a very happy dude, indeed.

I started sharpening the same way. A good spray of water on the surface and on with the steel. It was soon apparent that this stone was not only a little softer than Aka-pin #1. It was a lot softer and a lot more thirsty. I had to soak it for a couple of minutes to be able to keep enough water on the suface to build a slurry.

The sharpening feeling was quite similar to the Aka-pin #1 except the Aka-pin #2 gave up a slurry a lot faster than the previous one. The slurry was a light tan to orange colour without signs of grey, showing that this stone was not even close to the efficiency of the #1 stone. I sharpened a while on the slurry hoping to see an even finer result on the blade road due to the softer stone and apparently less agressive abrasives.
Stone coloured thick slurry showing no trace of metal filings
I was totally wrong in my expectations. The stone left a significant scratch pattern on the blade road and with a lot less pronounced contrast between ji and ha. I tried the stone on my VG-10 gyuto and my Aoko #1 Santoku just to see if it was equally poor on all steels, and it was. This stone is absolutely useless as far as I can judge it. It has a nice look, but as a sharpening stone it is absolutely without value. It will make a nice paper weight at work reminding me to never taking anything for granted when buying stones on the internet. If it had been an expensive stone I would have returned it, but as the return shipping in this case would be considerably more expensive than the stone itself, I'll just write it off on the lessons learned account.
A very significant scratch pattern for a stone this soft.

So what have I learned from this endavour? Never to judge a stone by its looks. Never to expect anything from a stone before I have actually tried it. That two very similar stones from the same mine and strata can perform very differently, and finally that buying stones on the internet is a gamble where you can make real bargains as well as really poor deals. Luckily the bargains have greatly outnumbered the bad deals on my behalf so far. That said, even the bad stones provide me with experience and knowledge about the complex world of Japanese natural stones.

Be prepared to do a few mistakes to score the good stuff. You can of course remove a lot of the risk by buying certified and expensive stones, but personally I find the treasure hunting very exciting and I urge you all to try and find your own jewels amongst the heaps gravel out there. Win or loose, it is exciting anyhow, and highly educational.

DarkHoek

7 Feb 2011

Honyaki sharpening - The JNAT "dream team"

True honyaki blades are indeed a special breed of knife. Very often they are hardened beyond practicality making them a true menace to maintain. However laborous these blades may be to keep sharp, I have come to love them unconditionally. I don't know whether it is the myth behind them, the excellent craftmanship, the excellent performance or the sheer beauty of these knives that has won me over. Probably it is a combination of all these factors. The fact that I just love to sharpen my knives probably helps a lot too. These are the honyakis to be sharpened in this test. From the top, a Kasahara Shiroko #2 honyaki 300mm yanagiba and three Aoko #1 honyaki knives from Jyunichi Takagi.

The honyaki blades used in this test of Japanese waterstones
In this excercise I have experiemented with some of the Japanese waterstones that are said to be best suited for sharpening honyaki blades. Based on my experiments I have found the stones that I find best for the task of getting my honyaki blades up to exceptional sharpness and to get that totally scratchless almost sand blasted surface on the bladeroad of my yanagiba. From the bottom of the below picture we have a #1500 grit White Aluminum oxide ceramic stone called a WA stone from Iida tools, then a #5-6000 grit WA ceramic and then I switch to Japanese naturals.

In the middle to the left is my large Aoto from Iida tools, and to the right an Aizu stone from Maxim at Japanesenaturalstones. Both stones are truly remarkable medium sharpeners. Second from the top to the left is a Takashima Myokakudani from Aframestokyo.com, a soft prepolisher with exceptionally even grit. To the right you see the characteristic red Nakayama Akapin from 330mate.com. A very soft but agressive and yet very fine stone. This is my "rescue" stone when I get these hard to remove scratches from man made stones. On the top left we have the very soft and very fine grit Hakka. A legendary finishing stone for honyaki. Also brought to me by Maxim at Japanesenaturalstones.com, and finally on the top right, an Oohira from Maxim also. The Oohira is what I believe to be a tomae; medium soft, fine grit, and I included it for comparison to the Hakka.

The candidates for the honyaki sharpening "dream team"
My trading agent in Japan told me that he always starts out with a special kind of synthetic stone to do the ground work on the blades. A #1500 grit White Aluminum oxide stone called a "WA" stone. The aluminum oxide is some of the hardest abrasives in man made stones except for diamond. The abrasive in this stone is very densly packed and leaves a very consistent scratch pattern. It is a very efficient and hard stone and it will easily correct any issues with the blade road and flatten the back side perfectly. It is very important to resolve all issues in this stage to be able to get a perfect result in the end. As you can see from the below pictures, the WA (White Aluminum oxide) stone is very agressive even on these very hard steels, making it perfect to do the ground work on the blades.
WA #1500 on Shiroko #2 honyaki

WA #1500 on Aoko #1 honyaki


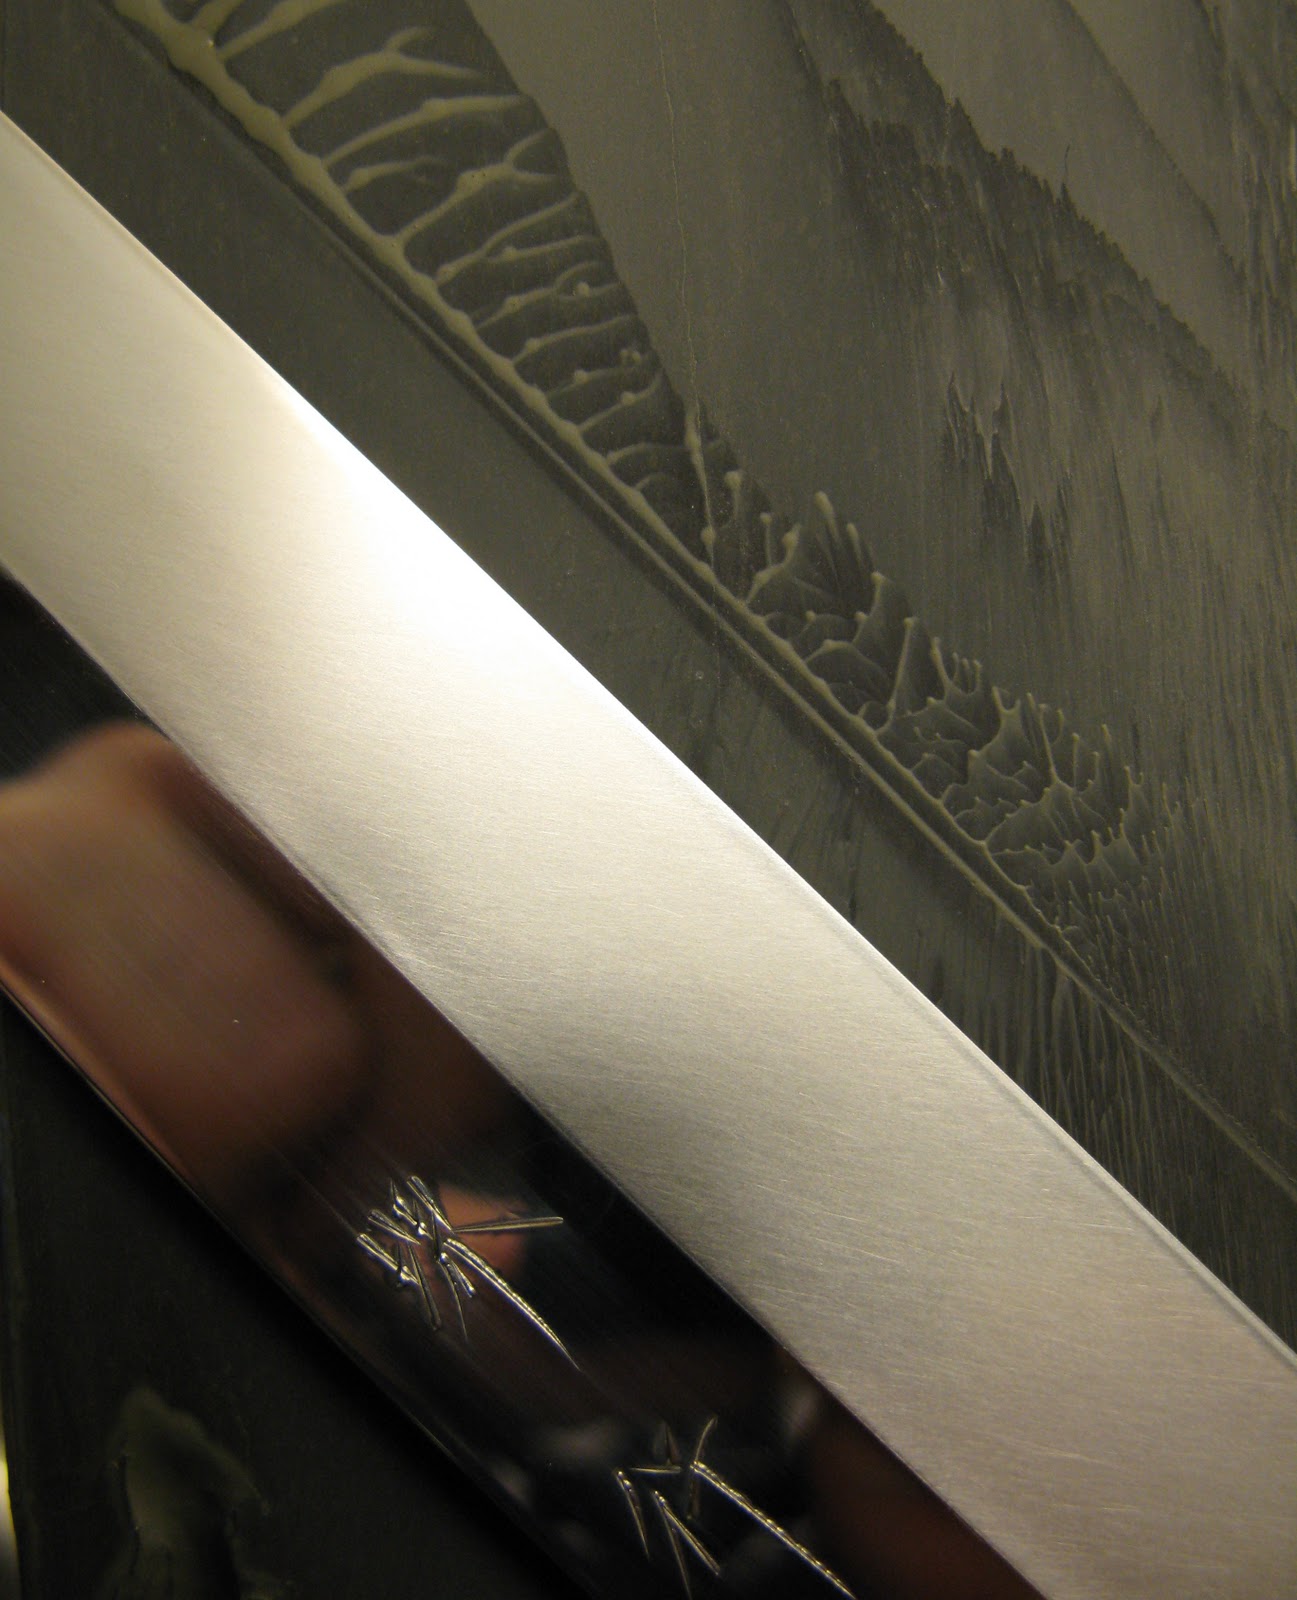
WA #1500 scratch pattern on Shiroko #2 honyaki
After this successful start I decided to apply the #6000 WA to erase the scratches from the #1500 WA stone. This finer stone actually caused more issues than it solved, so I left it out alltogether. Maybe a softer man made stone of finer grit would have performed better, but I did not go further on this and decided to switch directly to the Japanese natural stones after the #1500 WA.

Next up was the natural medium sharpeners. The Aoto and the Aizu. Both rated #2000-5000. I did not know which was the finer of the two, so I briefly tried both, and found that tha Aizu was both harder and a bit coarser than the Aoto, thus I began with the Aizu. This beautiful white stone with its olive green dots is a wonderful performer on hard steels and removed the scratches made by the #1500 WA with ease, leaving a dense and fine scratch pattern. 

The Aizu is a fairly hard and agressive stone


Aizu leaving a very nice and homogenous scratch pattern
 After the Aizu I could probably have skipped the Aoto alltogether and moved straight on to the Takashima. However, I wanted to compare the Aoto to the Aizu to place them individually in my setup for future reference. The Aoto proved to be everything I had hoped for. Most Aoto stones available today are of mediocre quality and would not be suited for sharpening the hard steels of the honyaki. This was not the matter with my Aoto from Iida tools. It proved to be a wonderful performer even on honyaki, both white and blue steel. The scratch pattern proved to be even finer than from the Aizu, producing the perfect basis for the Takashima.


The Aoto making a dense very fine slurry

The finish from the Aoto leaving not much to be wanted


Very happy about the progress so far, i moved on to the prepolisher. The Takashima Myokakudani. It is a beautiful stone with a very similar look to a Nakayama kiita, but with a more "sandy" look to it. The Takashima has a very homogenous structure with a very low content of unwanted particles leaving a very fine and exceptionally "clean" finish.
The Takashima Myokakudani
 
Closeup of the Takashima

The Takashima makes a very dense and creamy slurry
 
Closeup of the Takashima finish


I was very happy to see that everything was going the right way. The blade road on my yanagi slowly turned into that magically hazy finish. The edges on all my honyakis were pretty scary sharp allready, and I still had two more rocks to go.

Next in line was the legendary Hakka. A very rare stone hard to come by these days. Maxim at Japanesenaturalstones.com occasionally manages to source these beauties. I don't know how, and I really don't need to know as long as he keeps on scoring the good stuff and resell it at very reasonable prices.
The Hakka is a pleasure to use. It is fairly plain looking at first eyesight, but if you look closer you will notice beautiful renge or lotus scattered throughout the stone. The surface feels very smooth and even, almost like cool silk to the touch.

The Hakka quickly gives up a very dense and creamy slurry that "floats" the blade. After a while the slurry dries in to a fine clay that gives the legendary hazy, almost sandblasted finish.

Hakka stone, deceptively plain looking


Hakka closeup.  Notice the red scattered renge


Hakka slurry is almost like fine clay

Hakka silky finish

Hakka finish
After finishing with the Hakka, I tried the Oohira from Maxim I mentioned earlier in this post to see if I could do even better. This Oohira is a very fine stone of very good quality and it has proven to be exceptional on both carbon steels as well as stainless steels. However, the Oohira had some renegade particles that left light but still visible scratches on the now very silky surface of my yanagiba. I thus had to refinish the bladeroad with the Hakka to regain the abolutely flawless finish. 
 So no matter how good this Oohira performs on other steels, It is not the perfect finisher for my honyaki yanagiba and did not make the dream team.

A very high quality Oohira from Maxim

Oohira finish on the Hakka finished bladeroad.
Note the very fine but visible scratches


To sum up this rather time consuming excersise, I have found my honyaki "dream team". The #1500 WA, the Aizu followed by the Aoto and the Takashima finally followed by the Hakka. I could probably do with either the Aizu or the Aoto, but they really filled in each other in a way that makes it hard for me to separate them from my setup. I did not find the need for the Nakayama Aka-pin this time although it could probably be used successfully at some point in the process. However the point was to find the smallest setup of man made and natural stones to finish a honyaki to perfection. The perfect range for a perfect finish. I believe the team picture below is my "dream team" for this specific task.

So, what about the edges?  The sharpest I have experienced on any of my knives. Ever! Especially the Aoko #1's really got exceedingly sharp. My gyuto finally got that magical Shigefusa feeling to it, just sliding through everything I cut. The Shiroko #2 yanagi got that stickyness to the edge that shushi chefs speak so highly about. Sliding my nail along the edge very carefully makes the knife "stick" to it.
My personal honyaki dream team of Japanese waterstones
Hope you have enjoyed reading as much as I enjoyed sharpening. Thank you for your interest.

DarKHoek

Sources to score the good stuff:
Hakka stone, Aizu stone, Oohira stone : Japanesenaturalstones.com
#1500 WA stone, Aoto stone, Shiro #2 honyaki yanagi: Iida tools Japan
Takashima stone: Aframes Tokyo
Aoko #1 honyaki knives: Japan woodworker
Nakayama Aka-pin stone: 330mate

14 Jan 2011

Forcing a patina on the Shigefusa 240 kasumi Gyuto

This little experiment is a result of the Great Gyuto Shoot-out, where the Shigefusa 240 kasumi gyuto proved to be very reactive to a lot of different foods, and pushing it down to a runner up position beat by the excellent Devin Thomas stainless gyuto.

Using the Shigefusa over time will slowly but sporadicly build a patina on the blade. The result, however, is a long period with a partly reactive, seriously spotted and not very elegant knife. The solution is obvious. To force a patina under controlled circumstances, evenly building a patina on the entire blade layer after layer. Again, Mr. Øyvind Dahle put his precious knives at stake for me to play around with. Thanks, man!
Setup: Knives, mustard, vinegar, lemon, cotton cloth and finger stones
For this test I had access to a second Shigefusa. A nice Kuro uchi nakiri, probably with the same core and cladding as the gyuto. As the exposed area of reactive metal is a lot smaller on the Nakiri than the Gyuto, this would be the perfect place to test out the acidy mix before going all in. Before starting I used some fine stone slurry on a cotton swab to polish of any old spots and removing all traces of fat and dirt from the blade. 
Building a Nakayama Aka-pin slurry
Priming the polishing cloth with slurry


Removing stains and fat from blade

I used a 50/50 mix of Dijon mustard and white 7 % cooking vinegar and added a small squeeze of fresh lemon juice. This gave me a very nice "paint" easily put on with a silicon brush. Any brush can be used, but a silicone brush will be reusable after a good wash. 

After cleaning up the blades, I took them to my water tap and using the warmes water available I heated the blades. This heating will make the acidy liquid evaporate quicker, and by doing that making the surface of the steel react more quickly with the oxygen making a patina form on the steel more evenly.
Heating the blade under running water to acellerate evaporation and oxidation (patina) on the blade


Thick layer: Slower method, but it works fine

Shigefusas curing, slowly building a patina. For the patient souls.
I tried two different ways to apply the solution. One was to brush it on with the silicone brush as shown above. The other was to apply some of the solution on a cotton cheese cloth and wrap it up so that only the thin liquid was filtered through the cloth and applied to the blade as shown below. This last method proved a lot more efficient as the liquid was applied thinner, cooling the warm blade slower thus making it evaporate a lot quicker on the preheated blade and building a thicker patina.  
Adding a thin layer on warm blade proved to be quicker and easier done

Priming a cotton cheese cloth

After experimenting a little back and forth between the two methods, about 20 heatings and acid applications in total, I cleaned the blades off for an inspection. At first it didn't look like it had built a patina at all. However when placing a new stainless blade on top, I could easily observe the very nice almost champagne coloured patina that had formed on the Shigefusa blade. The hagane had blued up as expected, but as I had expected this blueish colour on the entire blade I was a bit surprised.  
Note difference in color between patina on the Shigefusa and the stainless steel

It was time to put things to the test. To see if the patina was resilient enough for normal use or if it would wear of at the first contact with real food. It was time to get Shiggy with it :o)

First up were a couple of ripe tomatoes. Usually this would stain the knife significantly, but the nice patina stayed nice with no new stains or ugly smell developing. Then a spiced raw chicken breast. Still nothing. Then I sliced the cooked chicken while quite hot. Still no reaction. The patina looked stable. After cleaning the knife off after slicing the hot chicken, the parts of the blade that had touched the warm protein had blued up a bit like the hagane had done in the first place. However the patina held up nicely and the blade did not react negatively to the protein. Very good!


After this rather uplifting experience I decided to put the patina to the ultimate test. The most reactive food from the shoot-out, the dreadful cabbage! I used the Shigefusa to finely slice the cabbage into angel hair slices closely observing the blade, but nothing happened. Nothing! I got braver. I buried the blade in the freshly cut cabbage strands, really packing it around the blade and let it sit there for 10 minutes.


Shigefusa in cabbage hell

Coming out of it with bells and whistles. I believe we have a winner!

Before this process the result would have been a partly black, partly rusty mess of a gyuto, but after pulling the blade out of the cabbage heap from Shigefusa's personal hell, it showed no sign of reaction. The cabbage was fresh, the blade still looked good and no nasty smell was evident.

Most important of all. In my opinion, the Shigefusa gyuto is still the best performing gyuto around by a good margin. With the nice patina forced on the blade, bringing the heavy reactivity to food under control, you no longer have a good reason not to want one. This is an absolute marvel of a knife, and I want one my self. Badly! Case closed!